She's been shopping for months. She's been planning special family outings. She's been volunteering to help with her kids' class parties. She's thoughtfully decked the halls of her home. She's baked enough to feed a small army. She's enjoyed quiet evenings by the fire with candles burning and the uplifting sounds of Christmas music wafting through the air. She's noticed the magic that catches under the wings of all those around her, and finds it rejuvenating, refreshing, comforting... one purpose that binds us, everyone. But now, 3 days post Christmas it has all come to a screeching halt. Everyone has forgotten Christmas cheer. The radio station is back to playing easy listening muzac. The stores are filling up with Valentine's candy. The neighbors are taking down their lights and dumping their Christmas trees out by the curb.
She pauses in front of the nativity scene on display in her home. She thinks of ways to carry on the spirit of Christmas throughout the year, because this kind of joy can be found outside of gifts and lights and frosted sugar cookies. It should resonate in our hearts every day of the year. We can make more time to gather around and read from Luke. We can gather more often at the dinner table and enjoy a bounteous meal. Our homes can always be a made to feel warm and inviting. And there certainly needs to be no reason for giving to others.
As she contemplates where to begin, which ornaments or Christmas tree to pack up first, her heart feels lighter now. She thinks of the New Year and the possibilities it holds for more dedicated family time, service to others, and meditation on her many blessings...

28 December 2009
24 December 2009

23 December 2009
Butcher, baker, candlestick maker...
Okay, so maybe I have only done the latter 2, but I've been a baking fool today. 11 loaves of bread kneaded and baked with my own 2 hands.
I cannot help but think of my mother when I bake. It's not even that I remember her baking a ton, it's that baking - especially bread - reminds me that I come from a long line of women that provided for their family in the graceful way that only a woman can do. And amongst all the domestic things I do, baking is the most empowering and enjoyable. I feel more like a "domestic goddess" when I bake than say, do laundry. And not because I am trying to achieve some "Stepford Wife" status but because the goods that come out of the oven are truly appreciated, and they are truly a sign of my affection for my family (and friends) and my devotion to being a nurturer.
So here are 2 recipes that might help you define yourself as more of a domestic goddess.
Oatmeal Bread
2T + 1t yeast
1c warm water
2t sugar
Combine and let stand for 10 minutes.
Add 4 eggs and mix for 5 minutes on medium speed with beater.
In separate bowl with a dough hook, combine:
3 c hot water
2 c rolled oats
1 c molasses
1 c minus 1T shortening
2T salt
*Of about 12 1/2 c flour - add enough to make a thin, smooth batter.
Let rest 10 minutes.
Again using dough hook, combine yeast mixture with oatmeal mixture.
Add remaining flour in small amounts until dough is no longer too sticky to handle, and smooth. I need by hand for at least 10 minutes, you can also use a mixer if you have one that is large enough.
Let dough rise until double in bulk (1 - 1 1/2 hrs.)
Portion into 5 loaves and place in prepared greased pans. Cut slits on each loaf, brush with vegetable oil and sprinkle with some oats. Let rise again until double in bulk.
Bake at 375 for 30-35 minutes or until evenly browned.
I make 2 large loaves and 6 small for giving away. For the small loaves: 15-17 minutes. For the large loaves: 28 minutes.
My mother-in-law's Cinnamon Bread
1c milk
1/4c shortening
1/4c sugar
1t salt
1T yeast
1/4c warm water
1 egg beaten lightly
3 1/2 - 4c flour
This is a small recipe, it makes 1 large loaf. If you want to make many loaves I suggest doing 4 times the recipe, which yields 6 medium sized loaves. But only use 3T yeast, not 4.
Activate the yeast in a large bowl with the warm water. Over stove, scald your milk. This is necessary in helping your dough rise. Add shortening and let melt over low heat. Add sugar and salt and let dissolve. Cool. Add beaten egg, and let cool some more... just enough that it won't kill your yeast. Add to yeast. Transfer to a bowl, unless you have a dutch oven sized pan you can scald you milk in. Add flour until you can handle the dough, about 5 minutes. Grease a large bowl or transfer to a greased bowl and let rise until double in bulk, 1- 1/2 hours.
Punch down. Let rest for 10 minutes.
Roll out into a rectangle about 14-16 inches long and about the width of a bread pan (obviously you will need to divide the dough first if you are making more than 1 loaf). Brush with milk and a mixture of :
1/4c sugar
1 1/2t cinnamon
Roll up jelly roll style lengthwise. Put into a well greased large bread pan and let rise another hour. Brush top with cooled, melted butter and sprinkle with more sugar/cinnamon mixture.
Bake a 350 for about 40 minutes. Remove from pan immediately.
ENJOY!!!
Like drinking liquid chocolate...
This is the hard stuff. ;)
INGREDIENTS:
1 cup whole milk
1/3 cup heavy cream
1/4 cup sugar
5 oz semisweet chocolate, chopped
PREPARATION:
Simmer the milk, cream and sugar together until just boiling. Stir in the chocolate until melted. Don't let it boil.
Warning - very rich. I've used coconut milk in the place of the heavy cream, it's less fattening but everything is relative when you are talking about drinking chocolate like it's water. Lol. I also dilute half a mug with 1%milk, so ratio milk:hot chocolate is 1:1.
YUM!
20 December 2009
In keeping with tradition...
I will repost my years old recording of Gesu Bambino. Got to play it again in church today... always puts me in the Christmas mood! Enjoy. :)
Gesu Bambino
13 December 2009
And the winners are...
Oh, did I forgot to mention that I would be out of town Friday and Saturday? Whoops. Sorry to have increased the suspense for everyone.
The winners drawn at random, are Celeste Louise, who won the Wall Candy Arts removeable decal!
And Laura Smith, who won the notNeutral Wood Bock Set!
Congrats ladies, and Merry Christmas!!! Look for an email from me!!!
10 December 2009
Wrapping Ideas

I'm linking up with The Creative Girl today for fabulous Christmas wrapping ideas.
I LOVE to wrap gifts. And I was taught how by the best. My mother-in-law is an Interior Designer/Decorator Extraordinaire and I have learned so much from her (and I'm not just talking wrapping paper).
She finds beauty in the simplest things and makes simple things beautiful. I remember the first time I saw one of her wrapped gifts. I was in awe. In fact, I owe her credit for the one gift I have wrapped in my house at the moment (lol). I have saved this box for YEARS now... since before my husband and I were actually married. She gave me some Victoria Secret lotion - Pear Glace - for my birthday one year. (Remember when that scent was all. the. rage?) She put it inside this gorgeous box, which I have preserved and set out among my Christmas decorations every single year.


Now let's see if I remember correctly how she did this. She started with a plain paper mache box. She spray painted it gold and then wiped silver paint over the top with a rag... while the gold was still a little wet, giving it a swirly/marbled effect. Paper Mache soaks up paint pretty fast so it may have required more than one coat of gold...
She always uses the most gorgeous ribbon, too. I love ribbon myself. This ribbon (which is the original) is perfect for this box. I tucked in some fresh evergreen under the ribbon and tied an ornament on top (cheap at Target).
I love to use dried flowers and berries and the like on top of gifts. Even fresh flowers are fun... save those little tubes the florist gives you for the ends of your flowers and a fresh flower on your gift won't wilt before the end of the party. Spray paint magnolia leaves in metallic shades and tie on with ribbon. Copper is my favorite.
I love to tie little things onto the tops of my gifts, too. Homemade tags are so fun, especailly this time of year. You can cut pics out of the thousands of catalogs that are arriving in your mailbox, or use scrapbook paper and make your own.
I also got the idea to use buttons strung on wire, and rocks hot glued to ribbon from my mother-in-law. See what I mean? Fount of creativity, that one.
Have fun with your presents this year. And if you want a fun read on wrapping gifts, check out this book by Rachel Ashwell - The Gift of Giving.
Remember to eneter the giveaway for the Wall Candy Arts Wall Decal and notNeautral Wood Block Set here. Comments closed at midnight CST tomorrow, Friday, December 11!
07 December 2009
Wall Candy Arts RoCoCo Decal and notNeutral Wood Block Set Giveaway!
I get so swept up in Christmas... I love to shop and I love to give. And I use the excuse of giving to shop more than I should. Lol. But this time I didn't have to do any of the work. Which is lovely!!!
I've got 2 really fun, unique products featured here, courtesy of http://allmodern.com. All Modern sells tons of great stuff - for home, for office, for baby and children. Some of their baby cribs and online toys are just fab. And of course (drumroll, please) you must check out what they offered to let me give away to one of you lucky folks...
Zees removeable wall decal by Wall Candy Arts, which works like a chalkboard I might add (how cool is that?):


OR zees awesome set of wood blocks, by notNeutral:


06 December 2009
Having creative friends, it's a good thing!
Let's face it, the best ideas come from other great ideas. I do believe as Tolstoy said that "art is imitation". We have to have seen something beautiful in order to know how to recreate beauty.
I am fortunate to have many creative friends. They inspire me and help get my own creative juices flowing. And we take care of each other... nurturing each other's ideas, helping bring them to fruition. Sharing our talents.
Char at Crap I've Made recently recreated these awesome peace ornaments from PB. I had been eyeing some fun ornaments in the Ballard Designs catalog, so I followed her lead and recreated my own spin off incorporating the peace sign.
Here's theirs:
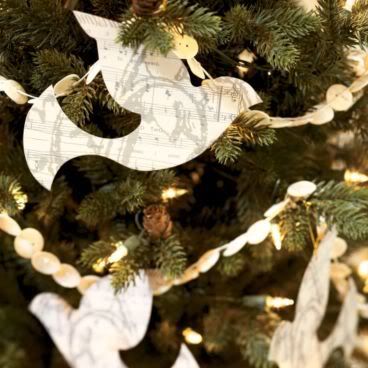
And here's mine:

I even have a few simple clear ball ornaments along with that I simply painted peace signs onto using glitter glue (you know, the cheap stuff your kids like to play with?).
Now I'm not as neat as Char. I didn't cover my edges or anything. I also don't do great, detailed tutorials with step by step pictures. I just don't like to, lol. But i will tell you exactly what I did, and I will show you more pictures and other ideas that have spun off this one.
Materials used:
cardboard
dove template (see below)
scrapbook paper
silver sharpie
mod podge
triple thick
brush for application
First, trace your template onto cardboard or other stiff backing.

Cut out and repeat with your scrapbook paper.
Before cutting out the template drawn on your scrapbook paper, find yourself a cup that is about the right sized circle for your distressed peace symbol. Find a corner to trace the rim of the cup on - you want just a hint of it to show. *Lightly* trace your circle and fill in the remainder of the peace sign. Get your silver sharpie out. If you look at mine closely I just barely shaded in my peace sign, I used quick, short, straight brush strokes on either side of the single line I'd drawn with my pencil, keeping the thickness even all the way around. I realize not everyone can freehand this kind of thing, but it really just takes a little bit of practice. You might want to play around with a scrap piece of paper first. :)
Now you are ready to cut out your scrapbook dove and mod podge it onto your cardboard backing. Now, I call these ornaments but mine are not actually hanging on my tree. I opted to stick them in with evergreen boughs in various places around my house - in a bowl as a centerpiece, and on my mantle. If you want it to serve as an actual ornament, you will obviously need to punch a hole before you apply the mod podge.
Let the mod podge dry about 15 minutes and apply your triple thick as a top coat. let the triple thick dry for at least 20 minutes. The triple thick is shiny, so it makes the ornament look classy, not like you just slapped some paper on an old piece of cardboard! Love that.
Here are some additional pictures!
In a bowl on the center of my craft room table (and the big reveal on my new craft room is coming very soon):


And since I was really feeling the natural color scheme Ballard has going on this year, I made a paper chain:

Lastly, here is a full shot of my mantle, with little silver birdies tucked in there, a crystal bead wreath, some ornaments up inside my sconces, and who knows what else to come... I'll continue to add to it, probably:


Enjoy!!!
*This project was entered into the contest at:
01 December 2009
On why I need designer jeans.
soap!),...................... and Saks Fifth Avenue.
That's right, I went shopping for myself on Black Friday this year. They were having a sale on their designer jeans and I was all over it.
It has taken a while for me to "get" the rationality behind a $100+ pair of jeans. Since highschool I've taken the middle road and worn mostly Gap jeans. Express if I am feeling extra sassy. And there is nothing wrong with them - they come in tall sizes (which I need) and they fit nicely enough. Until about noon or so when the butt is sagging (and no its not because of MY saggy butt, but rather material that doesn't give... that's my story and I'm stickin' to it).
It's hard to describe what it feels like to try on a nice pair of jeans. They move with you (not against you). The back pockets are in the right place (yes, even after you put them on). And they feel. so. good. In fact, trying on jeans has never been so fun when you are doing it in a room large enough that your elbows aren't knocking into the walls around you, and your salesperson is running all over the store for you, as determined as you are to find "the one" pair that will take you up a notch.
I guess my opinion on the matter shifted when I attended a photography seminar a couple months ago. We talked a lot about image, marketing and branding. 3 important targets on the business side of photography that I was severely lacking. Branding is the "intangible, personable and powerful message you portray" (Christopher Becker). It communicates who you are, what you do and WHO you do it for. And the benefits of branding yourself are countless... but the one that stood out most in my mind was maintaining a "top of the mind" status. Moreso than prestige, or greater recognition, or being at the head of the trend, I think that "if you can believe it, you can be it" mentality generates the most success.
So here I am dressing for the job I want. I'm communicating my worth.
Too bad I am often simply on my way to Walgreens.
29 November 2009
About me...

The run down: I love my family. I try hard to be a fun mom. {Birthday parties are my favorite.} I love artsy crafty things. CrEaTiViTy - it's like a fever some days. I love my home and beautifying it. Hey, if I'm going be a stay-at-home-mom I want a warm, inviting, comfortable place to stay! I'm a little bit Texas a little bit Utah. I've also lived in Hawaii and WISH I could live in Italy. I run and practice yoga. Ying and yang, that's me! I love photography and from that love a business has been born. I'm also a violinist and violist (by degree).
I'm in constant pursuit of ~il bel far niente~ {the beauty of doing nothing}, which I believe has nothing to do with being lazy and everything to do with gracefully letting go once in a while. Thoughts like this interspersed with creative ideas and tales from my colorful days with my 4 colorful children......... welcome to my blog (which may also change color from time to time). ;)
23 November 2009
Craft Partay!

On Saturday night I invited a few friends over to make these darling advent calendars (thanks Courtney!). We had so much fun gabbing and eating and sharing scrapbook paper. And listening to Christmas tunes (hey, so I was ready a little early this year!).
For this project you will need:
24 paper machie boxes, 2x3 in. each
scrapbook paper
mod podge
cricut numbers, or vinyls, or stamps
magnets (strong ones!)
hot glue
ink pad
a magnetic board for display
Trace your lids onto your scrapbook paper and cut out. Trying to keep like patterns and shapes apart is tricky. So I also made sure my numbers were different looking from one box to the next. Some of them were cut from a piece of scrapbook paper that had numbers on it., some were cricuts in different fonts. Mod pdoge your covers onto the lids. Let dry. Ink your edges (with a stamp pad). I went with a copper color to tie in the color of the paper boxes, and add a little sparkle. You could also paint the sides of your boxes red, green or even black, and ink your edges in black or silver. The possibilities are endless! Let the ink dry while you coordinate all your numbers. Apply the numbers with (you guessed it) more mod podge. Let dry. Go over the edges with ink one more time.
This project can be pricey. I got the boxes in sets of 6 from this site: http://www.createforless.com/Craft+Pedlars+Paper+Mache+Box+Bitty+Assorted+Kraft+6pc/pid152491.aspx?SI=33900f50-63d1-4925-84a7-a203414da727. The paper is cheap, unless you want every box to be different. But even then you use so little to cover each box. The magnetic board can be one you already have, so you can get multiple uses out of it. That is what I did - this chalkboard is on my wall year round. You can make your own with wood and galvanized sheet metal from the hardware store. Probably the most economical way to go. Or buy unfinished frames and back with the galvanized sheet metal, or a board sprayed with magnetic spray paint... I even saw some magnetic metal boards at IKEA for only $12.99. They come in white and red. Not as rustic looking, but still cute I think, especially if you want a more mod look.
Note that the boxes are SMALL. That is so they fit on a manageable size board (mine is 22x22, I would think 16x20 would be the smallest you could go with the small sized boxes). If you get the next size up you will need a really large board to stick them on.
Since the boxes need to be small they will only fit items like individual pieces of candy, coins, or stickers. You could also roll up scriptures on tiny pieces of paper if you want to add a religious touch. One of my friends suggested a scavenger hunt. You could roll up little hints and place them in each of the boxes to lead the family to bigger items, or even just one big gift at the end of the month. I checked out the party bin at WalMart (by the pinatas) and found several small trinkets that would work - parachute jump figurines, glow in the dark stars, rings... Any dollar store would also have good stuff I am sure.
... Enjoy!!!
Linked up at Sew Dang Cute!
17 November 2009
Don't forget about Thanksgiving
We all know how it goes, Halloween segues into Christmas with hardly a nod for Thanksgiving. That's the inspiration behind this project. And I love how it turned out!
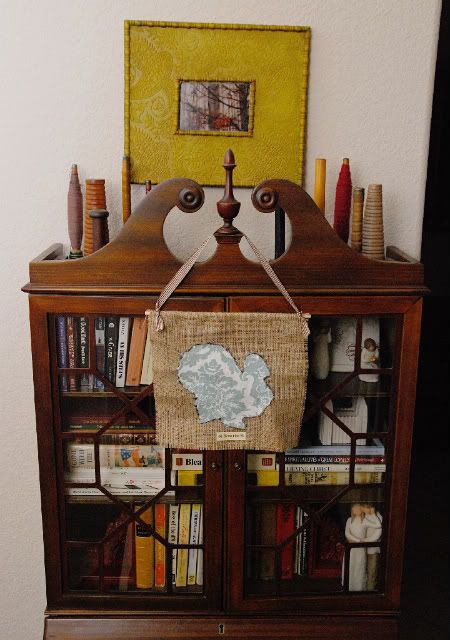
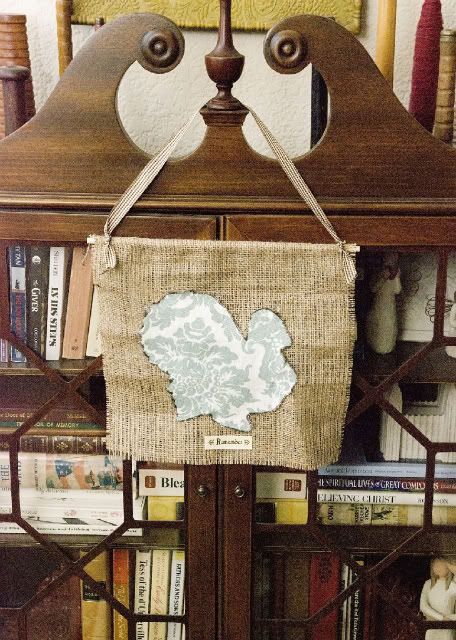
Does it make me a bad mom that I swiped the burlap from a stack of make-up work I received for Sasha (who yes, is in preschool). Lol! She was supposed to decorate it with fall leaves and twigs and stuff. Fun, but obviously my idea was better. ;)
The burlap is just wrapped around a dowel over the top. I hot glued the ribbon on - a know is tied on each end to help it look for finished since the ends are showing.
As for the turkey, I used a Martha Stewart cookie cutter as my template. I traced it with a brown sharpie right onto the material. That is why my frayed edges have a burnt look to them. Love that. And I used a snippet of ribbon for the label, which says "Remember".
My scanner is having issues, but I will add the template for the turkey later, should any of you lovely ladies like to make this super easy project for yourself!

15 November 2009
Some fun stuff to check out!
Check out the Fall Tour of Homes at Blissfully Domestic:

The Nester is also having a Tour of Homes. Check it:

Speaking of The Nester, wanna know what I made yestrday while feeling sick and sorry for myself? One of these ragamuffin galrlands. And now I am in love. Thank goodness, I was getting sick of fabric flowers already!
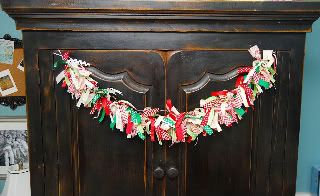
My Raggamuffin Garland. Perfect name for it, don't you think?
How do you like my new look? I got everything you see here for FREE at The Background Fairy and The Graphics Fairy. You have to go peruse all the great stuff she's got for the taking! Not to mention her fun craft ideas. Aren't these burlap napkin rings wonderful?

That's same image on those napkin rings that you see on my darling little Thanksgiving countdown in my sidebar. Also available at Background Fairy.
Last but not least, check out these adorable bracelets and headbands (and some other fab stuff) from One Creative Momma here and here! I feel like I have known Michelle forever... we started blogging about the same time. She has got one creative soul. Truly, truly unique! I love that!
13 November 2009
12 November 2009
the sewing table
First of all, thanks to all the newbies visiting my site via brown paper packages. This little blog hasn't seen that much action in a while... since back when I posted nearly every day and commented on about 100 blogs a week! Seasons change. The popularity of my blog posts on the birthday parties I do has had me thinking, though... I just might publish a book of my ideas one day. How fun would that be?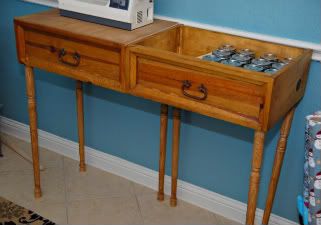
A few weeks ago I revealed that I was turning my dining room into a craft room. I've been slowly chipping away at it. Yesterday I finished the big feature in the room, a sewing table. Now I don't sew. Not yet anyway. So ignor the dinosaur sitting on top of said sewing table. It was my mother's. Let's just focus on the table, shall we? Which was the ingenius collaboration of my very handy friend Tannie and I.
These drawers have been sitting in my garage for years now. They were part of a bureau, which then became a TV stand, the holes where the drawers used to be now housing our electronics (DVD player, cable box, etc.). I just knew there was a use for the drawers though - some how, some way. I thought maybe window boxes would be cute. Then end tables. And finally, this sewing table. But I am NOT handy (this is where Tannie comes in) and so I inquired how it could possibly be done. An hour later - I kid you not - I had this table. It was so easy. I went to Home Depot, I bought some legs and fixtures, came home and screwed it all together. By myself. Just like that. Amazing.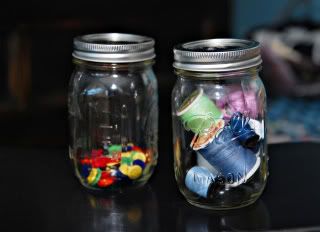
One unique feature is that I turned one drawer upside down to function as a desk surface, while the other is right side up - so that it can hold notions like thread, buttons, etc. This room is tiny so I need all the storage space I can get. Plus this is cute, with the jars and my files of ideas in the one side. I am still planning to design some labels for the tops of the jars.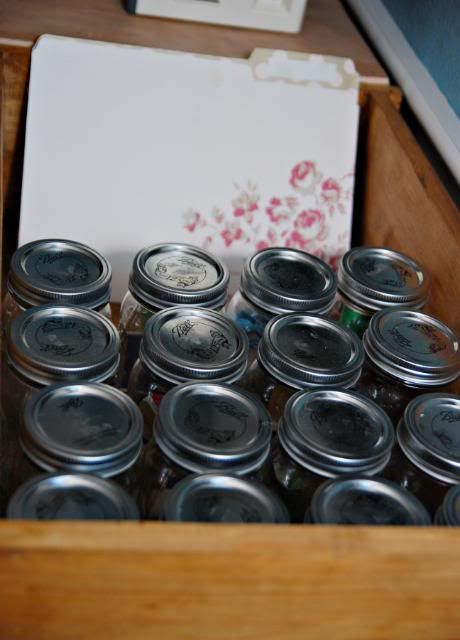
The side that is upside down needed some reinforcement in order to support the weight of a sewing machine, so I had some wood cut to size and nailed and wood glued it over the base of the drawer. Now it is completely sturdy.
Finished up with some stain yesterday and voila. LOVE IT!
More to come on the craft room...
03 November 2009
Cooking Party #2
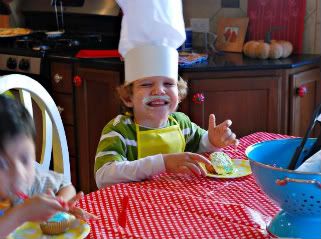
My little Drewby just turned 5. And he wanted the exact same party his older brother did when he turned 5... a cooking party. They both are my biggest helpers (for lack of a better word;)) at dinnertime. And I enjoy reusing ideas, heck I've already done most of the research (yes, research), so why not? And why not even make it better the second time around? So that's just what I did.
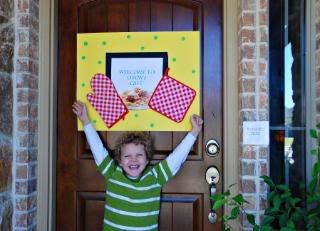
I made a cute sign for the front door using a potholder set from the $1 aisle at Target (although I think it was actually $2.50 for the set). It said "Welcome to Drew's Cafe". On a side note - I could be advertising for Target's $1 spot. I also bought vinyl tablecoths there... in red/white and turquoise/white checkered patterns. So, so cute and the perfect colors.
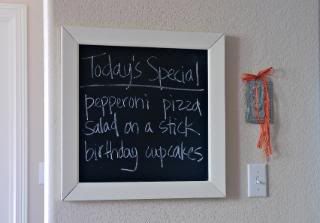
I displayed the menu-to-be on a chalkboard in the kitchen.
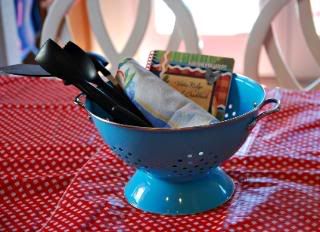
I filled a collander with cooking tools and used it for the centerpiece.
I scattered balloons all over the floor... I do this for EVERY party. Cheap decoration and an instant pop of color. Plus each kid can take one home with them if they'd like.
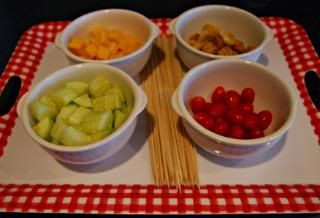
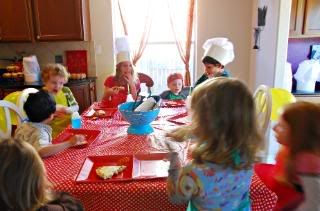
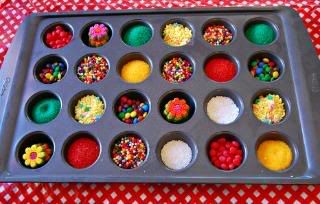
I used the same menu, because it was simple and yet it really made the kids feel like they were cooking a full meal. We made pizza (using pre-baked dough) first. Each kid had a chance to spread around the sauce, sprinkle a handful of cheese, and lay down some pepperoni. Then we made "salad on a stick"... which was chunks of cheese, cucmber, grape tomatoes and croutons on a bamboo skewer (idea courtesy of Family Fun). Last but not least, each kid decorated his/her own (pre-baked) cupcake, but not before tinting the icing themselves... they took turns stirring in the food coloring.
I made the same chef hats. the tutorial is online at Family Fun here (could also advertise for them - Family Fun are you listening? I love your mag!). And I provided each child with an apron from Oriental Trading. See here.
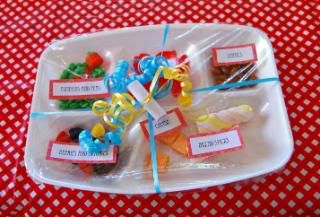
I made a little connection this time between Drew's age (5) and the 5 basic food groups. We guessed what Drew's 5 favorite foods were while we worked. And the party favors were styrofoam lunch trays filled with candy that looked like real food, representing the 5 food groups. The little attached scroll on top says:
"Fish, breadsticks, lentils and cheese,
Berries and oranges, pumpkins and peas,
Be sure to get your 5 food groups a day,
Drew's been growing for 5 years this way."
I used swedish fish, sugar babies for the lentils, orange and yellow starburst for the cheese, haribo candy berries, chocolate orange slices, and green M&Ms for the peas. Everything had a label. I really tried to execute this idea when I first hosted this party a couple years ago. But it did not turn out nearly as cute as it did this time. The only thing is it was too bad that his party fell the week before Halloween. I am sure the parents loved that I sent their kids home with a plate full of candy just 7 days before going trick or treating!
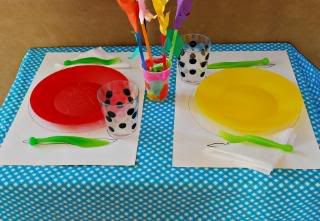
I added a game this time. There are a few fabulous activity ideas on this site. I made 2 placemats with an outline of a properly set table setting. Set up a small table big enough for 2 contestants and had them race each other to see who could properly set their setting first. So they each had a stack of plate, cup, napkin, fork and knife. Fun!
The benefits to this party idea are countless. It doesn't require a lot of decor. It doesn't require a lot of prep (you are, after all, cooking the party food as part of the party itself). It keeps the kids engaged the whole time (so they aren't running wild through your house). And it's unique!
22 October 2009
spooky banner tutorial
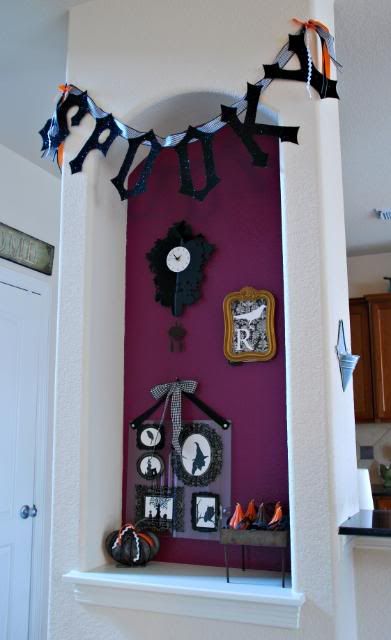
Last weekend my friends Tannie, Esther and I went to check out a relatively new housing development. Craftsman inspired floor plans. My favorite style. One of the model homes had the word "DREAM" hanging from a bedroom curtain rod. It was in a gothic font and the letters had glitter on them. I loved the concept, although it didn't look right to me in a bedroom. My thoughts were, however, that it would be a perfect idea for a Halloween banner. So the 3 of us got together and created this banner.
Here's what we used:
this font
black posterboard
Elmer's glue
brush
black (or orange, or silver) glitter
ribbon
Blow up the letters to the size you want and print out. Cut them out and use them as stencils on the black posterboard. (We smoothed out some of the edges on the letters because they were a little too ornate). Reinforce the back of your letters with popsicle sticks if your posterboard is too thin (if you do not, the glue will cause the post board to curl). Paint your letters (one at a time) with an even coat of glue. Sprinkle black glitter generously over the letter. Let your letters dry overnight. Using a wide ribbon (if your ribbon is not wide enough your banner will not hang flat), attach your letters using hot glue. Leave about an inch bettween letters... you don't want them to close together or they will overlap when you hang it up. Leave at least a 7 inch tag on each end from which to hang your banner. Add additional pieces of ribbon for whimsy... choose a variety of widths and textures. I used orange silk, black with handstitched edges, white ric rac and black and white striped. Black and white gingham and polka dots would also be cute! You can also hang the letter individually, each one with it's own piece of ribbon. Looks great across a mantle, hanging in a window, along the top of an armoire, or at the top of a niche like mine. I thought the letters might also look cute if covered in velvet. Oooh la laa!!!
Enjoy!
21 October 2009
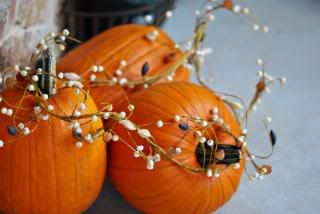
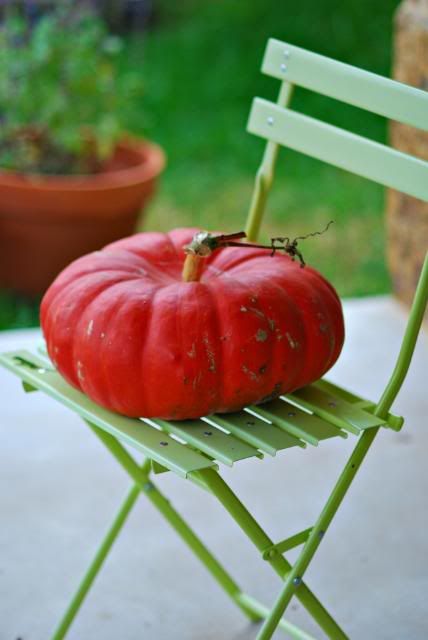
I love fall
Maybe it's the bounty of colorful vegetables.
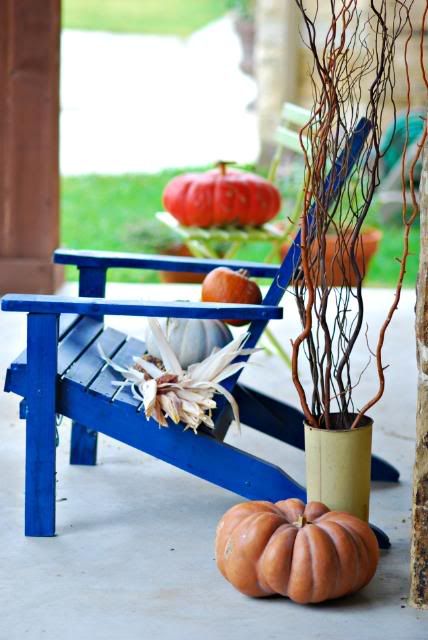
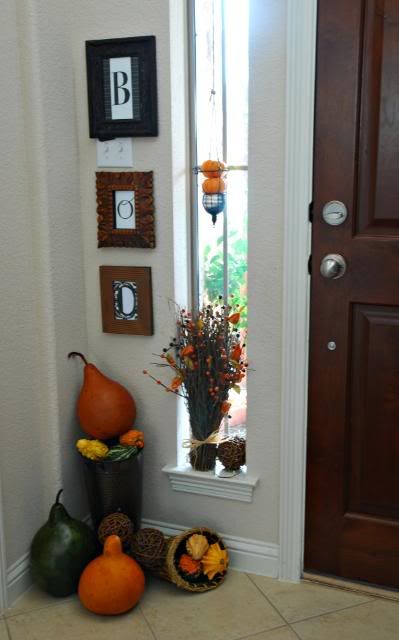
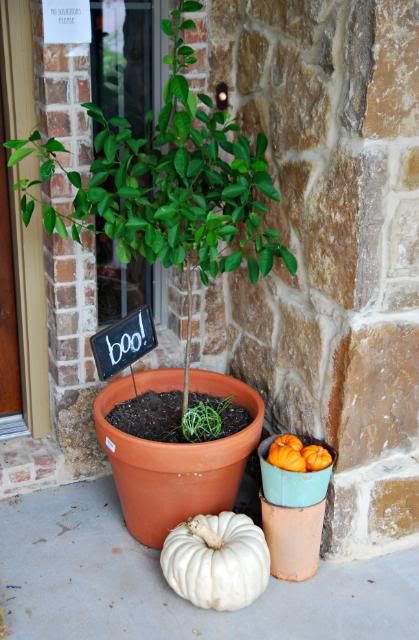
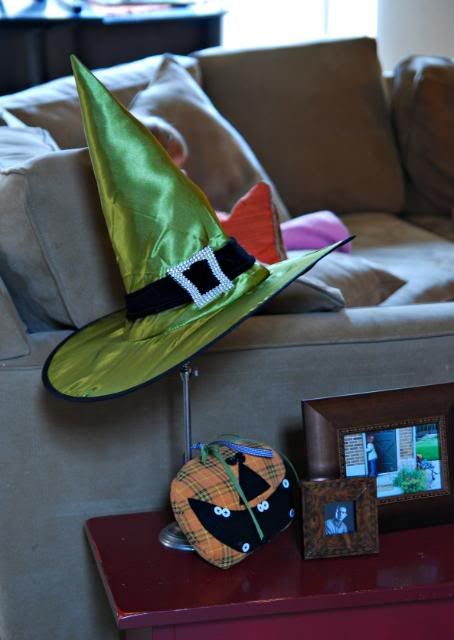
Maybe it's all the fun I'm having with Halloween decor.
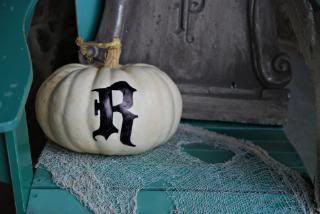
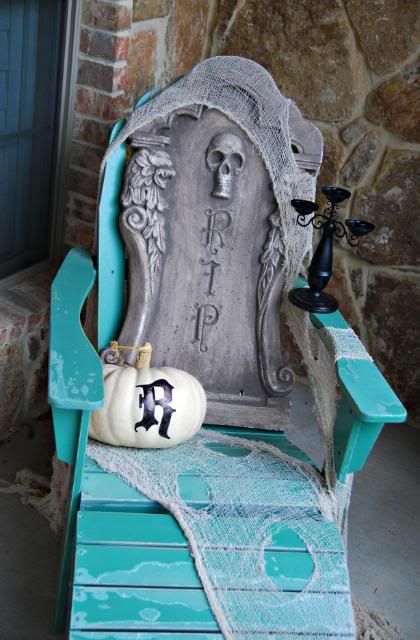
Stay tuned for tutorials.