Showing posts with label holidays. Show all posts

30 November 2011

Tis the season...

I've found some time to make a few new goodies for my home this Christmas!  You know how you sometimes don't know what you're missing?  Well I've been missing creating with my hands.  Apparently. Because now I can't seem to find a stopping point!  The photography suffices to an extent, but I guess every now and then I just gotta get out the spray paint, scissors, ribbon, glue... :)

I'm foregoing tree skirts this year in favor of something simple and lovely.  I cut up a bunch of burlap and made these sacks for the bottoms of my trees instead, and tied them up with lace.  I'm having a mostly white Christmas this year, so it's just perfect.  Perfect and simple.


My husband finds it amusing that it takes me DAYS to get my house decorated for Christmas.  I find it therapeutic!  I gotta do something different every year, not necessarily with all new things, but I like to think of new ways to display things, and just tweak it from year to year.  It makes it so much more magical!  How about you?  How long does it take you to deck the halls?  Do you enjoy it, or is it a chore?  I'm guessing, since most of you love craftiness like myself, that we are all int he same boat. :)

P.S. I am still posting at Brown Paper Packages every other week!  This week we're talking about Christmas bokeh:


{Ah, that's nice... isn't it?}

Come see how to get the great Christmas bokeh at BPP... should be up tomorrow or Friday. :)

P.P.S. Let's see if I can blog twice this month!  I'm also working on an angel wings project... as I have been obsessed with wings lately!

16 October 2011

Painted Pumpkins and giveaway announcement!

Well - I did it.  I made myself sit down and make something this week.  Actually, I made a few things.  I've been missing my paint brushes, fabric and tulle (oh my!).

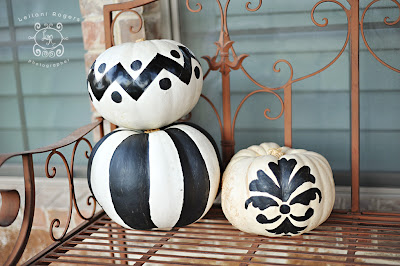
I hadn't painted pumpkins in a while.  And I needed something to do last week with my kiddos for family night.  You can see their pumpkins here (as part of my photography post at Brown Paper Packages).   My porch this year is predominantly black and white, so this is what I came up with for my own this year:


The striped one was easy... I just followed the lines of the pumpkin. For the chevron pattern I actually used electrical tape. Trying to decide if I think it looks good that way or if I should paint the pattern. The polka dots are painted. And the damask pattern I found on google images. I printed it out and copied it onto the pumpkin. All 3 pumpkins took me about 30 minutes to finish. And I used craft paint, which dries quickly. So it was a fast project.

Here's the rest of my porch... tutorial for the wreath coming up in a few days!


{Just love my big ole spider!!!}


One more thing - there will be a great giveaway here Tuesday!  Let's just say that if you have a little girl age 4-6 yrs. you are definitely going to want to enter!

See you then!

27 September 2011

Christmas Dove Ornament Tutorial

Ahem.  Hello. :)  Yes, I know this must look a little crazy.  I fall off the face of the planet for a couple months and then come back in September with a Christmas ornament tutorial.  Lol.  Actually, the tutorial is old.  I am bumping it up for Parenting Magazine, who wants to use my dove template in an upcoming article.  Maybe though, this is just the kick in the pants I need to get back on top of this blog.  I do miss it.  For what it's worth - in short - life is good.  Just busy, busy with my photography business and my 4 children.  It's hard to do it all... my favorite quote as of late: "You can do anything, but you can't do everything."  Wise words.

Anyway, on with the tutorial!

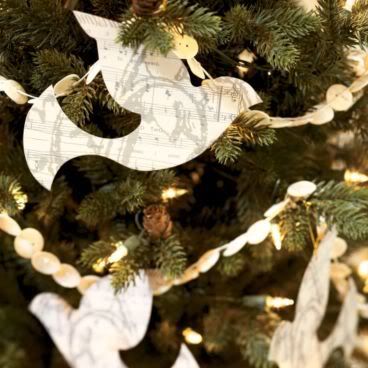
I came up with this idea after eyeing some fun ornaments in the Ballard Designs catalog a couple years ago, so I created a knock-off.

Here's theirs:

Photobucket

And here's mine:


I added a few simple clear ball ornaments that I simply painted peace signs onto using glitter glue (you know, the cheap stuff your kids like to play with?).

For the dove ornaments -

Materials used:
cardboard
dove template (see below)
scrapbook paper
silver sharpie
mod podge
triple thick
brush for application

First, trace your template onto cardboard or other stiff backing.


Cut out and repeat with your scrapbook paper.

Before cutting out the template drawn on your scrapbook paper, find yourself a cup that is about the right sized circle for your distressed peace symbol. Find a corner to trace the rim of the cup on - you want just a hint of it to show. *Lightly* trace your circle and fill in the remainder of the peace sign. Get your silver sharpie out. If you look at mine closely I just barely shaded in my peace sign, I used quick, short, straight brush strokes on either side of the single line I'd drawn with my pencil, keeping the thickness even all the way around. I realize not everyone can freehand this kind of thing, but it really just takes a little bit of practice. You might want to play around with a scrap piece of paper first. :)

Now you are ready to cut out your scrapbook dove and mod podge it onto your cardboard backing. Now, I call these ornaments but mine do not actually hang on my tree. I opted to stick them in with evergreen boughs in various places around my house - in a bowl as a centerpiece, and on my mantle. If you want it to serve as an actual ornament, you will obviously need to punch a hole before you apply the mod podge.

Let the mod podge dry about 15 minutes and apply your triple thick as a top coat. let the triple thick dry for at least 20 minutes. The triple thick is shiny, so it makes the ornament look classy, not like you just slapped some paper on an old piece of cardboard! Love that.

Here are some additional pictures!

In a bowl on the center of my craft room table :


A spin off - just brown craft paper with silver polka dots:


And since I was really feeling the natural color scheme Ballard had going on that year, I made a paper chain to "match":


Lastly, here is a full shot of my mantle, with little silver birdies tucked in there, a crystal bead wreath, some ornaments up inside my sconces, and who knows what else to come... I'll continue to add to it, probably:


Enjoy!!!

17 June 2011

Father's Day Printable

Well I finally got around to creating a tag for my husband's Father's Day gift.  This year we are making him a treat jar for his desk at work.  However, it is personalized just like a candygram.  Thought maybe some of you might like it, so I created a printable for you!!!

Father's Day Tag

I've never done this before, so hopefully it works. :)

Linking up:

05 May 2011

Happy Cinco de Mayo! Arroz con Zanahorias

This is a holiday you just can't escape in Tejas!  I have such fond memories of making tissue paper flowers in elementary school in honor of this day.  And seeing performances by dancers and musicians - so colorful and festive.


One of these days I am going to sit down and make some of these flags, or Papel Picado!  They make me smile!

Today I'm going to share one of my favorite recipes, shared with me by an old college roommate (Hi Isabelle!).  It's great with burritos!!!  My family eats it about once a week, picky kids included.


ARROZ CON ZANAHORIAS

2 cups of rice
2 1/2 cups of water
carrots, shredded
2 T butter
2 chicken bouillon cubes
Season All

Shred carrots in bottom of a saucepan.  As many as 2c if you'd like!  Saute in butter, add bouillon cubes and mash into mixture.  Sprinkle some Season All in as well.  Add water and bring to a boil.  Add rice and sprinkle some more Season All (you can be pretty generous with it).  Cook as instructed on rice package.  Enjoy!

21 April 2011

Repost: Good Friday Activity - Walk the Path our Savior walked...

This is a tradition I started with my kids 2 years ago.  It revolves strongly around my faith as a member of the LDS church, but the message is translatable in any faith.  Some materials are LDS materials for which I've included links should you want to use them yourself.

A lot of these ideas were derived from my friend Catherine at Blue Stocking Mama. Some of them will be familiar to many of you (like the 12 symbolic eggs portion), but there are many other unique ideas included as well!  So read on!

Fill 12 plastic eggs with these items, and label them in order from 1 to 12:

1.) small plastic donkey

2.) piece of bread/sacrament cup

3.) piece of soap

4.) drops of blood shaped from playdough (or just a small piece of cloth stained with red marker)

5.) 3 dimes

6.) thorn

7.) nail

8.) cross made from toothpicks or popsicle sticks

9.) piece of white cloth

10.) spices (allspice or cloves tied inside a little piece of cloth)

11.) stone

12.) leave empty

Find a map of Jerusalem. Here's a link with a decent picture map included:

http://www.lds.org/ldsorg/v/index.jsp?vgnextoid=2354fccf2b7db010VgnVCM1000004d82620aRCRD&a mp;locale=0&sourceId=0dae9c84f5d6b010VgnVCM1000004d82620a____&hideNav=1

Have an Easter egg hunt... either hide all the eggs at once or do it one at atime, allowing your children to take turns hiding it for their siblings. (This way breaks up the sitting and listening part for especially young children. )

Open egg #1 - Read summary on back of GAK (Gospel Art Kit) 223 (Triumphal Entry). The Gospel Art Pictures are available for print if you are interested.  Just click on the number and it will take you to a page where you can print the image from, and see the brief summary printed on the back of it.  Make ahead or let kids themselves make palm leaves. (Using green construction paper, fold in half. Draw a semi circle from the folded center outward. Cut out. Cut "fringe" along curved edge. Unfold and glue a popsicle stick for the stem.) Give each kid a palm leaf and let them practice saying "Hosanna! Blessed is he that cometh in the name of the Lord." Find Bethany, Bethpage and the Mount of Olives on the map and place stickers on each. Explain that the journey for Jesus to Jerusalem was 2 "furlongs" or miles.

Open egg #2 - Read summary on back of GAK 225 (The Last Supper) and explain that our Easter feast will be symbolic of the Last Supper, but the sacrament we take every Sunday was put in place at this very moment in time.

Pass out raisins, french bread and juice - kids may also dress up in robes if they'd like.

Open egg #3 - Read summary on back of GAK 226 (Jesus Washing the Apostles' Feet).

Open egg #4 - read summary on back of GAK 227 (Jesus Praying in Gethsemane). Find Gethsemane on the map and place sticker.

Open egg #5 - Read summary on back of GAK 228 (The Betrayal of jesus).

Open egg #6 - talk about friendship and loyalty; How is Jesus loyal to us? How can we be loyal to him? How can we be loyal to those we love? Have kids try on "Jesus sandals". (they're just paper cutouts) And sing "I'm Trying to be Like Jesus".

Open egg #7 and #8 together - Read summary on back of GAK 230 (The Crucifixion). Let the kids smell/taste vinegar. Find Golgotha on the map and place sticker.

Open egg #9 and #10 together - Read summary on back of GAK 231 (Burial of Jesus).

Open egg #11 and #12 together - Read summary on back of GAK 232 (Jesus' Tomb).

Make "Resurrection Rolls" (recipe courtesy of All Recipes):

1 (10 ounce) can refrigerated crescent dinner rolls

8 large marshmallows
1/4 cup melted butter
2 tablespoons ground cinnamon
2 tablespoons white sugar

1.Preheat oven to 400 degrees F (200 degrees C). Lightly grease a baking sheet.

2.Separate crescent rolls into individual triangles.
3.In a small bowl, mix together cinnamon and sugar.
4.Dip a marshmallow into melted butter, then roll in sugar mixture. Place marshmallow into the center of a dough triangle. Carefully wrap the dough around the marshmallow. Pinch the seams together tightly to seal in marshmallow as it melts. Place on a baking sheet. Repeat.
5.Bake in a preheated oven until golden brown, about 15 minutes.

Sit and eat the rolls while watching "He Is Risen" ("Animated Stories from the New Testament")

Sing "Did Jesus Really Live Again" (I use these GAK pictures to go along with the words: 233234239)

Then talk about Easter the way we celebrate it. Have another Easter egg hunt, this time with candy inside the eggs. Sit down and discuss the origin (using pictures, i.e. clip art or coloring pages which are easy to print off the internet) of modern-day Easter symbols:

Eggs - represent life (in all living creatures, life begins with an egg)

Grass - the Garden of Gethsemane

Easter Bunny - derived from bunnies, lambs and other animals which symbolize new life during the Spring season

Lilies - the first flower to bloom after Christ died

Candy - the sweet and pure love of our Savior

Baskets - traditionally wooden, remind us of the cross upon which Christ was hung

New hat/shoes (clothes) - Explain that when I was a little girl, I always got a pretty, new, Sunday hat (one of which I kept, and will show my kids). The hat represents the humity we feel as we bow our heads in remembrance of our Savior. And new shoes, another tradition, represent the washing of the Apostles' feet by the Savior.

I think it would be nice to wrap up by saying that we should be mindful of all these things as we spend time with our loved ones on Easter Sunday, and express our gratitude to our Heavenly Father for the gift of eternal life by keeping a prayer in our heart.

Thanks again to Catherine for getting the creative juices really flowing! She's one smart mom!

Hope some of you can use a few of these ideas as well! I just think it is so important to take some of the focus off the secular nature of this sacred holiday.

17 February 2011

Milagro Party!

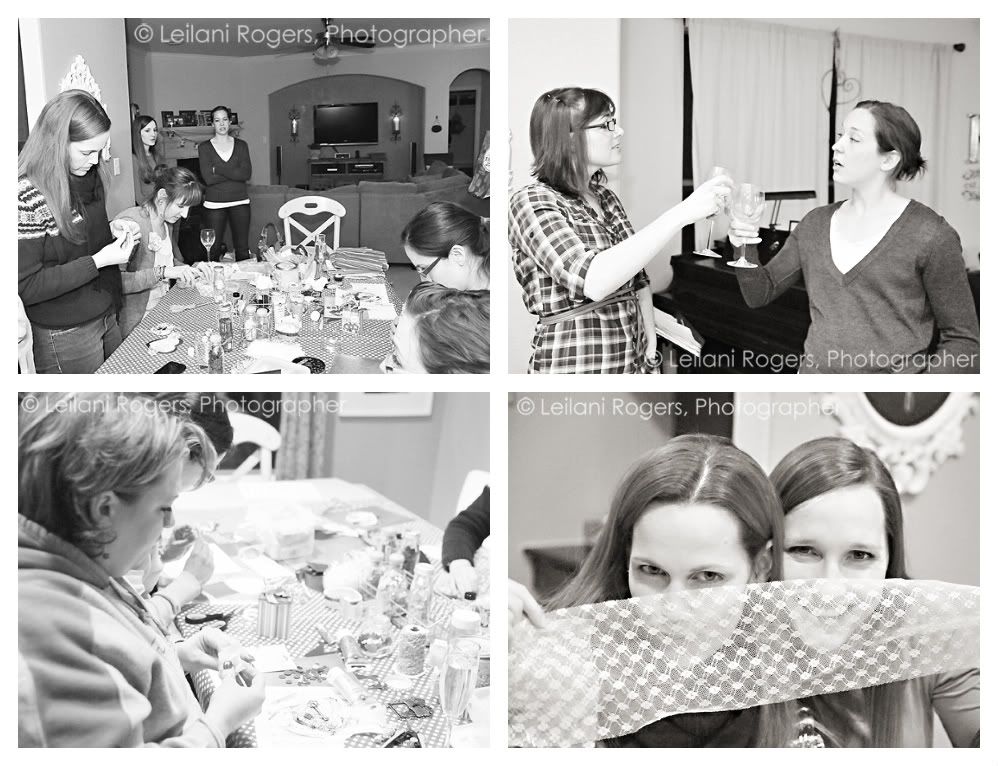
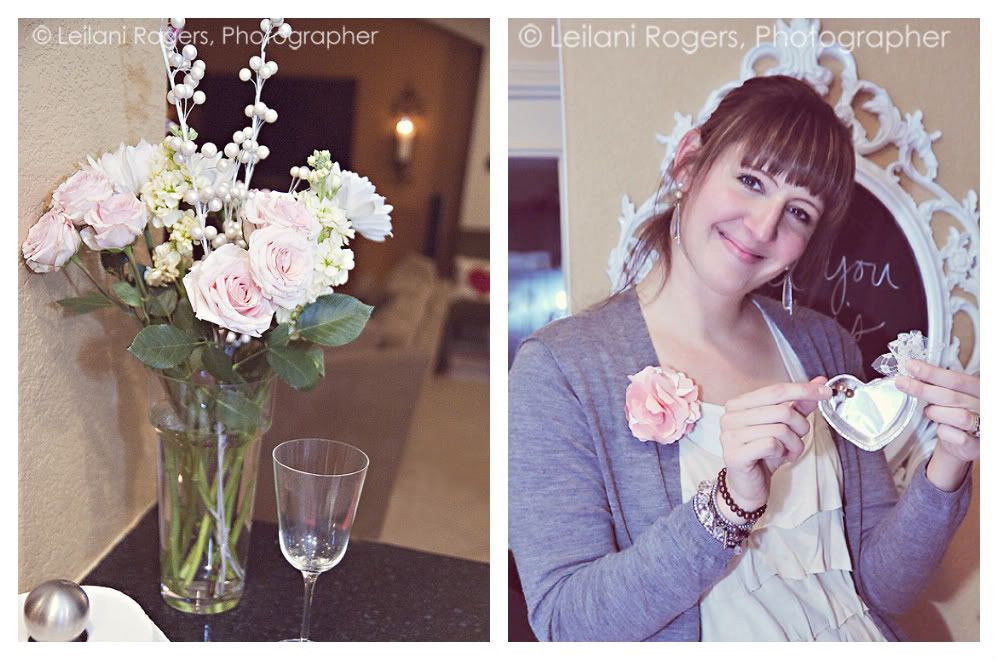
The milagro party was super fun.  Here are some pictures!!!


Red, pink, white - yep, all the valentine colors are there alright.


Took me a while to get started on my own... I was way behind the others!


Writing a love note to our hubbies was an option... nobody chose to do so. Craft or bust, ladies!


Um, this was the only cookie left, the one I saved for Sasha...

Finished my milagro around 11PM.  Last man standing!

I definitely see more milagros in my future!


14 February 2011

What we did, what we gave, what I wore...

Happy Valentine's Day!!!  Hope you're all enjoying your day! Here's what we've been up to today.

Last night Cupid made his annual visit, leaving goodies for the kiddos (a club penguin puffle and funky socks).  The kids awoke to a "heart-y" breakfast of strawberries, heart-shaped toast, and mini powdered donuts.  I made the same lunch for them that I do every year:


Everything inside was either heart-shaped or red: juice, apples sliced round-wise with the core cut out in a heart shape, a sandwich, pretzels, and pink Little Debbie's snack cakes.  Of course a love note, too!

Here are the valentines they gave their friends this year:


Got the templates here.

And here is what I gave my friends and their teachers:


Is that not the cutest idea?  Tissue paper corsages.  I got it HERE.  You can't tell since I took the picture using a mirror, but it has the word love scribbled all over the white tissue paper in red pen.  LOVE!  And then I layered in some plain natural colored tissue paper as well to give it a little more interest.

Didn't leave my hubby out!  He found this in his car this morning:


The oversized postcard, in french!

And what did I get?  Flowers from the Mr.  And this darling bubblegum necklace from my dear friend Esther.  She made it from this tutorial!!!  Super cute, huh?  When you get a chance go over and say hi (to Esther), she is new to blogdom!!!  Her blog is called Sweet Potato and Chocolate, which are her cute little boys' nicknames.


Hope you are enjoying your day.  Lots o' blog love to you!

09 February 2011

Making Milagros

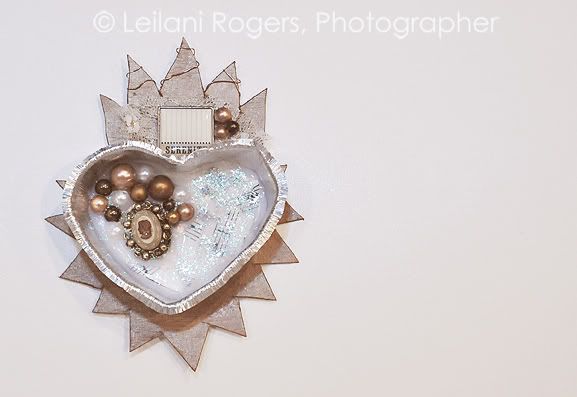
I have always been drawn to contemporary milagros, the kind used in decor.  I am a lover of mixed media too - paper, fabric, metal, wood, paint, ink, etc.   That whole folky genre of art makes me smile! 

Last year was my first attempt at making a milagro. 

[DSC_0003.jpg]

But this was before I understood it's roots.  Now you are probably wondering as well - what is a milagro, what is it's origin?  Milagro means "miracle" and once upon a time milagros represented wishes.  In catholicism people would wear milagros to present their needs or the needs of those they loved to the saints.  If it was a healing wish, perhaps for a hurt arm, they might wear a silver arm charm on a necklace.

Today the creation of milagros has morphed into the use of mixed media, among other things.  Below are some fabulous examples.

By Teresa McFayden:
Faithmilagros

And by Heather Bullard:

Artbliss8

Here are some other goodies I have made or picked up that remind me of milagros.

A mosaic I made last year:

[DSC_0005.jpg]

This fun accent I bought for my office/design room from Hobby Lobby:


I am so excited because I've got some friends coming over tomorrow night for a milagros party. I suppose that it is because of the popular symbol of the heart that I see in many of these gorgeous renditions that I associate milagros with Valentine's Day. Plus, Valentine was a saint. So it is fitting in my mind to include milagro making into my V-Day festivities.:)

We'll also be decorating sugar cookies and writing love notes (ooh la la) to our hubbies.  I'll be sure to take lots of pictures and share with you after the weekend!

PS - Please vote for my His and Her Valentine's swag in THIS contest!  And don't forget to eneter the $45 gift certificate giveaway to CSN stores!

01 February 2011

His and Hers Valentine's Swag


Oh my goodness, what's a girl gotta do to get a little creative time???  I've been creating this swag in my mind for weeks.  I'm happy to say I finally have something to show for it.  And I am giddy with how it turned out.  Hope you will be too...

I got these little white buckets in the $1 aisle at Target last year.  Knew I could do something with them, but not sure what.  Eventually the idea of some sort of swag or advent thing came to mind.  But advent calendars are so overdone... by myself included!  Plus, I only had 7 of them.  As I began decorating them though I had an a-ha moment - I could make his and hers buckets!

Loving the mustache craze right now - so I knew I had to put those on the boys' buckets (3 boys - my 2 sons and my hubby).  But for girls it took a while to come up with something gender-specific.  I was playing around with cupcake liners along the inside of the buckets when it occurred to me that I could use the liners as skirts on the BOTTOMS of the buckets.  So clever am I, no? ;) So I made 3 of those too (one for each daughter, and myself).

Materials:
felt stickers (on sale right now at Hobby Lobby - red heart shapes)
felt heart outlines (not stickers, I just glued them on)
miniature buckets (I've seen them at various places!!! and if you can't find a color conducive to V-Day, mod podge them or spray paint them!)
cupcake liners
sharpie (for the stache)
tissue paper
ribbon

Really the trickiest part of this little project was tying on the buckets - getting them evenly spaced and to all face forward was tedious.  But I'll take you through the previous steps as well.

First I stuck my heart-shaped velvet stickers and outlines on... front and center of each bucket.  Then I used double stick tape to attach a cupcake liner to the bottom of the girly ones.  And I took a marker to the boy ones and drew on various versions of mustaches (below the felt hearts).  Next I tied the buckets to one long piece of ribbon.  Double tie each one to be sure it stays in place!  Last I stuffed each bucket with some natural-colored tissue paper.  This will hide whatever goody I put in there on Valentine's Eve. ;)


I added a few extra strands of ribbon above my swag, and tied on a few scraps at the end.  To take the gender specificity a but further I tied a short piece of black tulle to either side of the boy buckets (they look kinda like bow ties to me - would be cute tied to the top, too), and a pink ribbon/white ric rac duo to the top of each of the girl buckets.  Perfectly frilly and handsome - each one!


Enjoy!!!

PS - See me HERE today!

Linking up!


Show and Tell Green


Join  us Saturdays at tatertotsandjello.com for the weekend wrap 
 up           party!


30 December 2010

Happy New Year!

I am so excited for 2011.  I love the coming of a new year.  I love starting with a clean slate.  I love getting a new calendar and filling it with grand plans.  There are some really fun, really cute calendars for FREE around blogland.  You should really check them out.

First, we have the Blog Guidebook 2011 offered by Lyndsey and Sarah HERE.  I love, love the graphics in this calendar.  It is SO GOING up in my kitchen!!!


You can download the calendar for free here!

If you prefer something striking yet simple, check this one out from Sprik Space.


Aren't the colors delicious?  You can dowload this one from here.

I downloaded a darling miniature one for one of my best friends, who adores owls.  I found it at My Owl Barn


It was so fun to pick and choose which art work she'd like for each month.  In the end I laminated it and put a binder ring through it.  Tied on a fun ribbon and now she has the cutest little calendar for her purse.  Love it.

Scout the internet, I am sure there are more.  Nie Nie has a fun calendar for sale, too. 


It's made of all her seasonal headers, which I love and adore! 

HaPpY  NeW  yEaR!!!

20 December 2010

Bells are ringin', children singin'...

...all is merry and bright!


Easy Christmas decor... painted chip board letters in back, and these fun stand up letters from Hobby Lobby in front!  The back letters are just tall enough to peek out over the top of the front letters.  Makes me smile every time I look at them!

handmade projects