29 November 2009

About me...


The run down: I love my family. I try hard to be a fun mom. {Birthday parties are my favorite.} I love artsy crafty things. CrEaTiViTy - it's like a fever some days. I love my home and beautifying it. Hey, if I'm going be a stay-at-home-mom I want a warm, inviting, comfortable place to stay! I'm a little bit Texas a little bit Utah. I've also lived in Hawaii and WISH I could live in Italy. I run and practice yoga. Ying and yang, that's me! I love photography and from that love a business has been born.  I'm also a violinist and violist (by degree). 

I'm in constant pursuit of ~il bel far niente~ {the beauty of doing nothing}, which I believe has nothing to do with being lazy and everything to do with gracefully letting go once in a while. Thoughts like this interspersed with creative ideas and tales from my colorful days with my 4 colorful children......... welcome to my blog (which may also change color from time to time). ;)

23 November 2009

Craft Partay!


On Saturday night I invited a few friends over to make these darling advent calendars (thanks Courtney!).  We had so much fun gabbing and eating and sharing scrapbook paper.  And listening to Christmas tunes (hey, so I was ready a little early this year!).

For this project you will need:

24 paper machie boxes, 2x3 in. each
scrapbook paper
mod podge
cricut numbers, or vinyls, or stamps
magnets (strong ones!)
hot glue
ink pad
a magnetic board for display

Trace your lids onto your scrapbook paper and cut out.  Trying to keep like patterns and shapes apart is tricky.  So I also made sure my numbers were different looking from one box to the next.  Some of them were cut from a piece of scrapbook paper that had numbers on it., some were cricuts in different fonts.  Mod pdoge your covers onto the lids.  Let dry.  Ink your edges (with a stamp pad).  I went with a copper color to tie in the color of the paper boxes, and add a little sparkle.  You could also paint the sides of your boxes red, green or even black, and ink your edges in black or silver.  The possibilities are endless!  Let the ink dry while you coordinate all your numbers.  Apply the numbers with (you guessed it) more mod podge.  Let dry.  Go over the edges with ink one more time.

This project can be pricey. I got the boxes in sets of 6 from this site: http://www.createforless.com/Craft+Pedlars+Paper+Mache+Box+Bitty+Assorted+Kraft+6pc/pid152491.aspx?SI=33900f50-63d1-4925-84a7-a203414da727. The paper is cheap, unless you want every box to be different. But even then you use so little to cover each box. The magnetic board can be one you already have, so you can get multiple uses out of it. That is what I did - this chalkboard is on my wall year round. You can make your own with wood and galvanized sheet metal from the hardware store. Probably the most economical way to go. Or buy unfinished frames and back with the galvanized sheet metal, or a board sprayed with magnetic spray paint... I even saw some magnetic metal boards at IKEA for only $12.99. They come in white and red. Not as rustic looking, but still cute I think, especially if you want a more mod look.

Note that the boxes are SMALL. That is so they fit on a manageable size board (mine is 22x22, I would think 16x20 would be the smallest you could go with the small sized boxes). If you get the next size up you will need a really large board to stick them on.

Since the boxes need to be small they will only fit items like individual pieces of candy, coins, or stickers. You could also roll up scriptures on tiny pieces of paper if you want to add a religious touch. One of my friends suggested a scavenger hunt.  You could roll up little hints and place them in each of the boxes to lead the family to bigger items, or even just one big gift at the end of the month.  I checked out the party bin at WalMart (by the pinatas) and found several small trinkets that would work - parachute jump figurines, glow in the dark stars, rings...  Any dollar store would also have good stuff I am sure.

... Enjoy!!!

Linked up at Sew Dang Cute!

17 November 2009

Don't forget about Thanksgiving

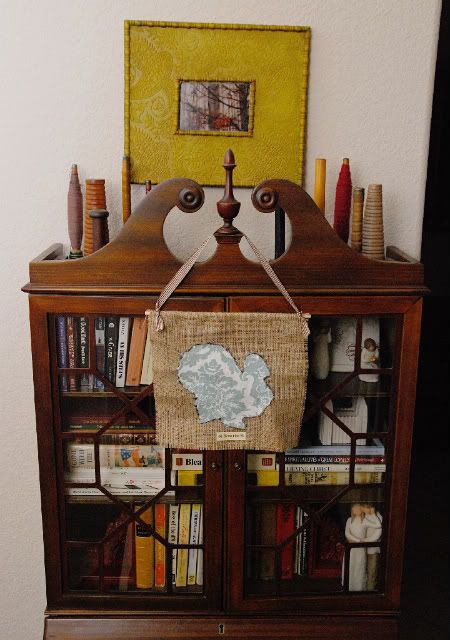
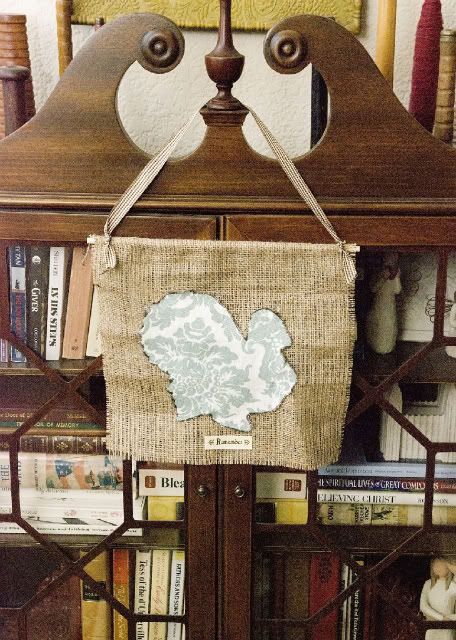
We all know how it goes, Halloween segues into Christmas with hardly a nod for Thanksgiving. That's the inspiration behind this project. And I love how it turned out!

Photobucket

Photobucket

Does it make me a bad mom that I swiped the burlap from a stack of make-up work I received for Sasha (who yes, is in preschool). Lol! She was supposed to decorate it with fall leaves and twigs and stuff. Fun, but obviously my idea was better. ;)

The burlap is just wrapped around a dowel over the top. I hot glued the ribbon on - a know is tied on each end to help it look for finished since the ends are showing.

As for the turkey, I used a Martha Stewart cookie cutter as my template. I traced it with a brown sharpie right onto the material. That is why my frayed edges have a burnt look to them. Love that. And I used a snippet of ribbon for the label, which says "Remember".

My scanner is having issues, but I will add the template for the turkey later, should any of you lovely ladies like to make this super easy project for yourself!

15 November 2009

Some fun stuff to check out!

Check out the Fall Tour of Homes at Blissfully Domestic:

Blissfully Domestic Fall Tour of Home

The Nester is also having a Tour of Homes. Check it:


Christmas Tour of Homes with The Nester


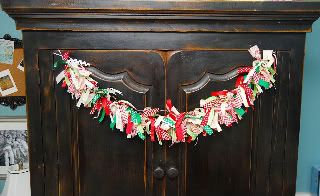
Speaking of The Nester, wanna know what I made yestrday while feeling sick and sorry for myself? One of these ragamuffin galrlands. And now I am in love. Thank goodness, I was getting sick of fabric flowers already!

Photobucket

My Raggamuffin Garland. Perfect name for it, don't you think?

How do you like my new look? I got everything you see here for FREE at The Background Fairy and The Graphics Fairy. You have to go peruse all the great stuff she's got for the taking! Not to mention her fun craft ideas. Aren't these burlap napkin rings wonderful?

Photobucket

That's same image on those napkin rings that you see on my darling little Thanksgiving countdown in my sidebar. Also available at Background Fairy.

Last but not least, check out these adorable bracelets and headbands (and some other fab stuff) from One Creative Momma here and here! I feel like I have known Michelle forever... we started blogging about the same time. She has got one creative soul. Truly, truly unique! I love that!

13 November 2009