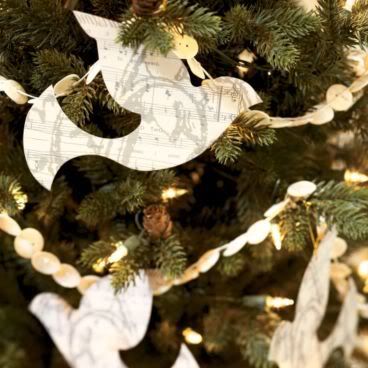
Ahem. Hello. :) Yes, I know this must look a little crazy. I fall off the face of the planet for a couple months and then come back in September with a Christmas ornament tutorial. Lol. Actually, the tutorial is old. I am bumping it up for Parenting Magazine, who wants to use my dove template in an upcoming article. Maybe though, this is just the kick in the pants I need to get back on top of this blog. I do miss it. For what it's worth - in short - life is good. Just busy, busy with my photography business and my 4 children. It's hard to do it all... my favorite quote as of late: "You can do anything, but you can't do everything." Wise words.
Anyway, on with the tutorial!
I came up with this idea after eyeing some fun ornaments in the Ballard Designs catalog a couple years ago, so I created a knock-off.
Here's theirs:
And here's mine:
I added a few simple clear ball ornaments that I simply painted peace signs onto using glitter glue (you know, the cheap stuff your kids like to play with?).
For the dove ornaments -
Materials used:
cardboard
dove template (see below)
scrapbook paper
silver sharpie
mod podge
triple thick
brush for application
First, trace your template onto cardboard or other stiff backing.
Cut out and repeat with your scrapbook paper.
Before cutting out the template drawn on your scrapbook paper, find yourself a cup that is about the right sized circle for your distressed peace symbol. Find a corner to trace the rim of the cup on - you want just a hint of it to show. *Lightly* trace your circle and fill in the remainder of the peace sign. Get your silver sharpie out. If you look at mine closely I just barely shaded in my peace sign, I used quick, short, straight brush strokes on either side of the single line I'd drawn with my pencil, keeping the thickness even all the way around. I realize not everyone can freehand this kind of thing, but it really just takes a little bit of practice. You might want to play around with a scrap piece of paper first. :)
Now you are ready to cut out your scrapbook dove and mod podge it onto your cardboard backing. Now, I call these ornaments but mine do not actually hang on my tree. I opted to stick them in with evergreen boughs in various places around my house - in a bowl as a centerpiece, and on my mantle. If you want it to serve as an actual ornament, you will obviously need to punch a hole before you apply the mod podge.
Let the mod podge dry about 15 minutes and apply your triple thick as a top coat. let the triple thick dry for at least 20 minutes. The triple thick is shiny, so it makes the ornament look classy, not like you just slapped some paper on an old piece of cardboard! Love that.
Here are some additional pictures!
In a bowl on the center of my craft room table :
And since I was really feeling the natural color scheme Ballard had going on that year, I made a paper chain to "match":
Lastly, here is a full shot of my mantle, with little silver birdies tucked in there, a crystal bead wreath, some ornaments up inside my sconces, and who knows what else to come... I'll continue to add to it, probably:
Enjoy!!!


1 comment:
I remember reading the original post! Cute idea and one that people can actually do. Those are my favorites - one's that are doable and not too hard but still come out great!
Post a Comment