Showing posts with label banners. Show all posts

04 April 2011

If you hang it, it will come... BLOOM banner!

So we are in between seasons here in Tejas.  And my lawn and yard show it... things are beginning to fill in, the grass is returning to it's usual shade of green.  To help move things along I thought I'd make a little BLOOM garland for my home. :)

Materials:

{stencil kit purchased at Office Depot}

{fabric cut into 1 in. strips}

{plus fine twine and scrapbook paper of your choosing}

All I did was place scrapbook paper behind each stencil and secure with double sided tape.
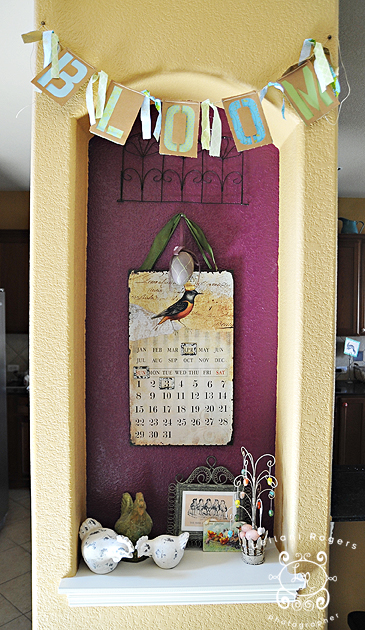


I threaded the fine twine through the letters (holes were made using a bamboo skewer).


And tied some ribbon on each end and in between the letters.

Simple, just the way I like it.  If you prefer something more frilly, then add some rosettes as well!

Enjoy.

21 November 2010

Give Thanks Banner


 Well, I think I'm all bannered out, now.  I'll wait until Valentine's to make any more. ;)

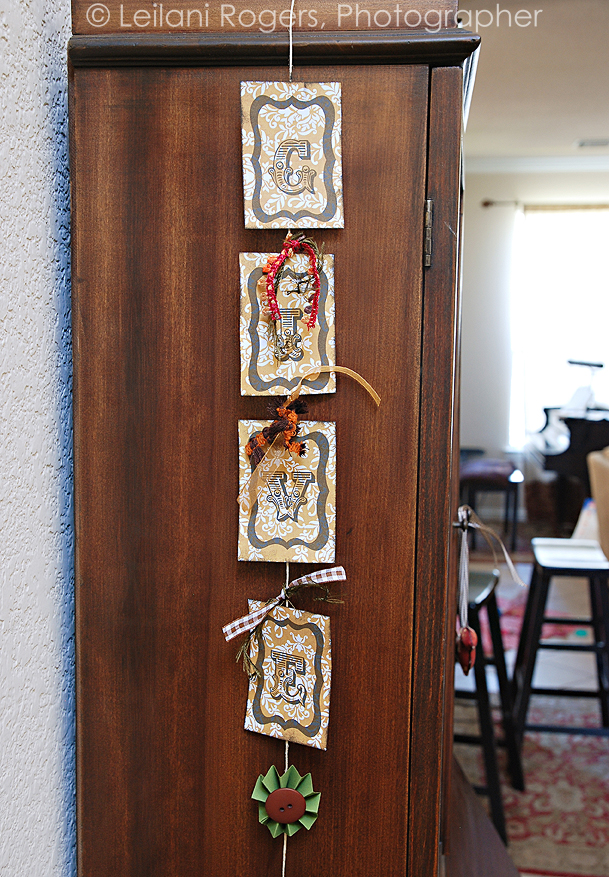
I loved the print out provided by At Second Street a couple weeks ago, and thought it would make a really fun miniature banner for my entry way.

Materials:

twine
scrapbook paper
buttons
ribbon scraps
hot glue
distressing ink

I reduced the size of the printable so that 2 letters would fit on a 4x6 size of scrapbook paper.  (Don't remember what % I set it at.)  After cutting my letters and distressing the edges, I hot glued each letter to the twine, leaving space in between each for embellishments.  Added pinwheels (formed from scrapbook paper) with a button hot glued to the center of each, and glued those in between the words "Give" and "Thanks".  Found some cute embellishing ribbon in the scrapbook section of Hobby Lobby and tied them on between the letters.  The buttons and ribbons helped weigh the banner down so that the letters don't flip around, which is nice.

Looks so cute in my entry way, don't you think?

Enjoy!!!

{Tuesday is the last day to enter the Crown Bindery Giveaway!!!  Click here to enter!!!}

16 November 2010

Autumn Garland


I've been stringing a lot of things this month!  I love garlands and banners for the holidays...

This garland was made using a pack of vase fillers from Target, as well as some fun pumpkins I bought in my grocery store's floral department, and cinnamon sticks.

I used thin, thin twine to string everything.  Looks like this:


Tied a fun pleated ribbon onto each end...


Didn't take me long at all!  So go whip one up for yourself!


Linking up:


BWS tips button

PS - I've got another giveaway coming up!  Stay tuned!!!
 

PPS - My friend Kierste from Brown Paper Packages is having a giveaway for a $50 gift certificate from the Vintage Pearl!  Go enter!!!

14 November 2010

Clean out your kitchen banner

Some of you may remember my "clean out your closet necklace".  I made it from a bunch of things I had stashed away for a creative stroke of genius.  And thus was born this necklace.


Well a similar thing happened with this banner, which was made from placemats, dinner napkins, and curtain tie backs.


I had a very specific idea for a Thanksgiving banner in my head, the color scheme and everything.  These items just happened to fall into that vision perfectly!  Here's how it was made.

First I cut the napkins and placemats (from Target) - the yellow just a bit smaller than the burlap since I was layering and wanted yellow on top.  Then I whip stitched a line across the top of the 2... more for looks than functionality, because the placemats were coming unwoven after I cut them.  The material is much rougher than real burlap; it's more like a basket weave kind of texture.  But once I hot glued the twine onto the back of each piece, it held together.

I drew the letters by hand with a brown sharpie... so much easier than using a brush and paint.  Because I love a folky look, imperfections like lines that aren't real straight, etc., appeal to me.  So I just freehanded it.

I finished the banner off with some rosettes, from curtain tie-backs of all things!  I rarely use the tie-backs that come with curtains, but I save them for little things like this... resourceful, eh?  I've had these tie-backs since we moved in 2.5 years ago!  I also tied on some remnants from the napkins as well as ribbon to each end of the banner.

Here's a close-up of some of the details:


Enjoy!

Linking up:

UndertheTableandDreaming 

mmm button

12 September 2010

Spooky Banner Tutorial

Is it really time to start thinking about Halloween?  Or Fall, for that matter?  We're still in the 90s down here in TX.  And had a few days of pure rain, so it's also nice and humid outside right now.  But, I'll play along with all you craftsters and join the Fall/Halloween idea train...

Photobucket

Last fall while my friends and I were out and about looking at model homes we came acroos a cute bedroom with the word "DREAM" hanging from a curtain rod. It was done in a gothic-like font and the letters had glitter on them and hung from ribbons.  This look has since become very trendy, but at the time I hadn't seen anything like it.  We decided we loved the concept, and thought that it would be a perfect idea for a Halloween banner.


Here's what we used:

this font

black posterboard

Elmer's glue

popsicle sticks

brush

black (or orange, or silver) glitter

ribbon


Blow up the letters to the size you want and print out. Cut them out and use them as stencils on black posterboard. (We smoothed out some of the edges on the letters because they were a little too ornate in our opinion).

Reinforce the back of your letters with popsicle sticks if your posterboard is too thin (if you do not, the glue will cause the post board to curl).

Paint your letters (one at a time) with an even coat of glue. Sprinkle black glitter generously over the letter. Let your letters dry overnight.

Using a wide ribbon (if your ribbon is not wide enough your banner will not hang flat), attach your letters using hot glue. Leave about an inch bettween letters... you don't want them to close together or they will overlap when you hang it up. Leave at least a 7 inch tag on each end from which to hang your banner.

Add additional pieces of ribbon for whimsy... choose a variety of widths and textures. I used orange silk, black with handstitched edges, white ric rac and black and white striped. Black and white gingham and polka dots would also be cute! You can also hang the letters individually, each one with it's own piece of ribbon.

Looks great across a mantle, hanging in a window, along the top of an armoire, or at the top of a niche like mine. I thought the letters might also look cute if covered in velvet!

Enjoy!